Re-Screening Bayliner Portlights
by Jim & Norma Crandall (BOC: jimz3288)
Re-Screening Bayliner Portlights
by Jim & Norma Crandall (BOC: jimz3288)
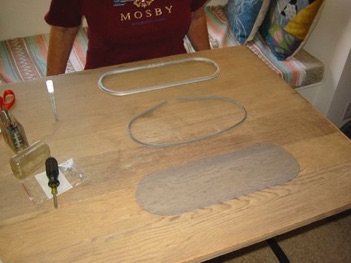
Tools and materials needed: Phillips head screwdriver, scissors, single edge razorblade, large fingernail file or similar thin rounded tool. New rubber pipiing unless old piping is usable. Lightweight grey screen material is easiest to install.
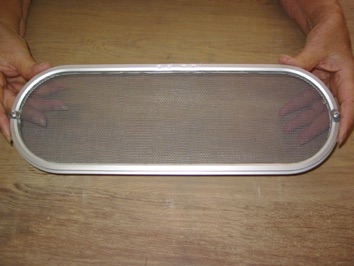
Disassemble screen and clean all parts. Use razorblade to trim old screen away from frame joint. If old rubber piping is usable, keep together with its original frame.
Assemble tools together with frame, rubber piping and screen on a firm, flat working surface.
Using the screen frame as a pattern, trace outline onto screen stock and cutout the fabric with scissors.
1
2
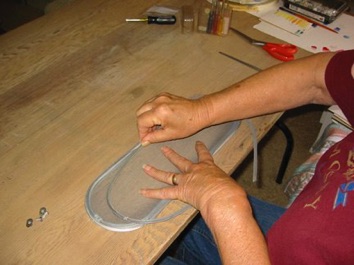
With the inside of the screen frame facing upward, place the screen fabric on the frame and the rubber piping on top of the fabric.

Position the screen material evenly around the frame and place the (old) rubber piping over the screen. Try to align screw holes in piping with holes in frame. If new piping is used, cut it an inch or two longer and trim excess at the end of the process.
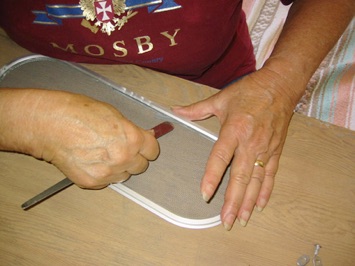
Using the large, blunt end of the fingernail file, begin inserting the piping and screen into the frame groove at exactly the center of the frame and exactly the center of the piping. (See arrow.) Secure the frame and screen with your hand to avoid distortion of the screen.
3
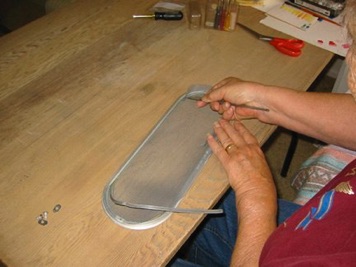
Working from the center outward, continue inserting piping and fabric into the groove along the top edge of the frame. Keep the mesh of the screen running parallel to the top of the frame. If the mesh becomes distorted at this stage, it will remain distorted.
Adjust for wrinkles in the screen as you proceed. For excess bulge in the screen, press in on lower edge of the piping . To release a tension pull, press in on the top edge of the piping.
4
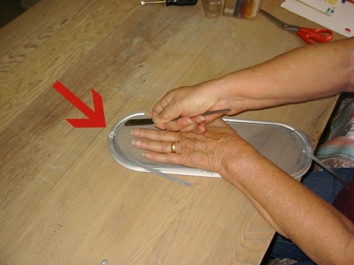
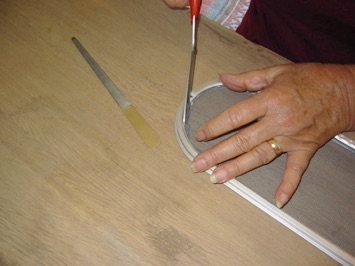
Hold the screen material firmly against the flat workiing surface as the rubber piping and fabric are inserted around the curved ends of the frame. If the old piping is being used, and the installation was started at excactly at the top center of the frame, (see fig. 3) the holes in the rubber should align exactly with the hole in the frame at both ends.
5
4
Keeping the screen material flat and wrinkle-free, continue inserting rubber piping and fabric into the frame groove. If the center of the (old) piping was located at exactly the center of the frame, (see fig. 3) both ends should tuck in with no gap remaining or trimming needed. If new material was used, it was cut a bit longer and the ends can be trimmed off.
There will be a short span of screen material that is not secured with the rubber piping. This cannot be avoided without unfastening the frame joint which is not advisable.
6
6
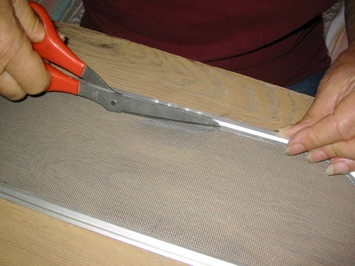
Trim off any excess screen material with scissors. If the frame was used as a pattern to cut the fabric, there will be very little to trim. Excess material can also be trimmed with a single edge razor blade but care must be taken not to puncture the installed screen.
7
Where the ends of the screen frame are joined at the bottom, trim the screen fabric carefully. Avoid leaving a gap between the screen and the frame. (Optional: a thin ribbon of clear silicone caulking may be applied between the unattached fabric and the frame to complete the seal.)
8
9
10
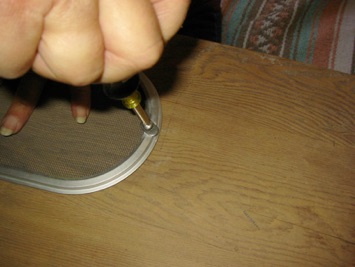
With the phillips head screwdriver, re-attach the tabs that hold the screen frame into the port light. If new rubber piping is used, a small hole will have to be made where the screw goes through the rubber with an awl or ice pick. Try not to sever the piping completely.
The finished frame. There should be no wrinkles and the lines of the screen mesh should be as undistorted as possible.
Reinstall the screens into the port lights and enjoy your new, critter-proof cabin.


This Bayliner “how to” was created by Jim and Norma Crandall (jimz3288) for the Bayliner Owners’ website.You are invited to visit our personal websites, photo albums and videos at: www.jimznet.com
PAGE 2
PAGE 3
PAGE 4